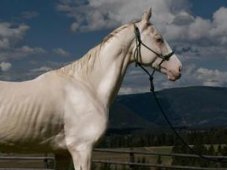
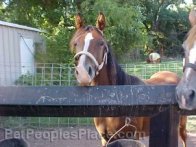
The Young Horse: Ground Manners
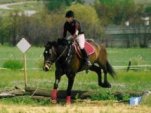
Every equine that is handled by humans must learn ground manners. Ground manners is training that keeps the horse or pony from biting, kicking, charging, stepping on you or leaning on you. This includes letting your horse rub it’s head on you when haltering or bridling. Ground manners enables your horse and you to have a better relationship. It won’t move around when you saddle, brush, pick it’s feet or do other chores that require you to handle your horse.
Your horse has probably learned a few lessons from when you halter broke it. If you haven’t done that first step, you should go back and read the first article in this series – Halter Breaking. Following are lessons in Ground Manners, all problems are organized the same way: the problem is stated, a description follows, solutions are offered.
Things you need:
- Halter
- Lead Rope
- 8 – 10 foot soft cotton rope
- Lounge line or Long line
- Lounging whip or dressage whip
- Saddle blanket or pad
- Small cloth
- Fence post in an enclosed area
The Horse is Afraid of Everything That Touches it
A horse that shys at every touch is dangerous and unpredictable. Horses are prey animals, so it is normal for them to be afraid of new and unusual objects, fast movement, and people or other things that come up behind them. What you want to do is expose your horse to many different situations so it has a wider experience base to draw on. Horses have incredible memories. They remember good and bad. You want to convince the horse that some things that seem bad are really neither good or bad, but neutral and not to be feared. In this lesson you will sack the horse out with various objects in order to overcome it’s fear.
Step 1
Have your horse haltered with a lead rope on. Your horse should be halter broke. If not, read the article on Halter Breaking and begin there. If your horse is halter broke, take it to a safe area, a round pen is good. Begin by leading your horse around. Then stop the horse. Pet it’s head. Slowly work your way to it’s neck. Pet it slowly, gently, not patting, not feathery light. If it will let you touch it’s ears, top of it’s neck, poll, then do so. Move slowly. If at any point your horse gets upset, return to a spot that it accepts. Stay there a minute, then slowly work your way back to the neck, then shoulder, back, barrel (don’t lean down, you don’t want to get kicked in the head). Your goal is to be able to touch the horse all over on both sides of it’s body. We aren’t picking up feet, just touch the legs. If the horse doesn’t accept you touching the back legs, leave them alone.
Step 2
When your horse accepts touching all over with no fear, use a soft cloth to rub it. Let your horse smell the cloth. Rub with the direction of hair growth. Start at the head, like you are grooming. Work your way back, do both sides. If at any time the horse gets scared, go back to a comfortable spot. If it really panics, stop, put the cloth away and use your hand. When the horse accepts the cloth, move to the next step.
Step 3
Using a light weight saddle blanket, not too big, approach the horse. It really helps to have all these things over the fence of the area you are training in so the horse can see them and get used to them being around. You may want to walk up to them and let the horse smell them before you start the lesson. You will use the pad the same way you used your hand and the cloth. After it smells it, touch it to the horses neck. If it backs away, let it smell it again. Touch it again. If it still backs away or begins to panic, go to step 2. If it accepts it, work your way back toward the tail, rubbing with the hair. Do both sides. Talk quietly to your horse, reassuring it. Touch it’s neck, back, legs, hips, barrel. When it accepts this move on. These steps can take hours, days, weeks. Very frightened, nervous, or abused horses take longer.
Step 4
Now use a soft rope to do the same thing. The rope should be about 8 – 10 feet long. Coil it up and let the horse smell it. If it accepts it, begin touching it on the neck. If it is afraid, let it smell it again. Any time the horse panics, go back to the hand or soft cloth, or even the pad.
You want your horse to accept the rope touching it all over. This part of the training will help you in tying, longing, ground driving and if your horse gets tangled up. It is very important to get your horse to accept the rope. Take your time.
As you work, begin to uncoil the rope and let it lay across the horse’s neck, pulling it off slowly. Then it’s back, rear, against the legs. Don’t hit at it. Later, as the horse gets more comfortable with the rope, you can begin to move it faster, but never strike the horse with it.
Step 5
Do the same exercise with a longing whip. This time you will spend more time touch the horse’s lower legs. You want to get the horse to the point where you can touch it’s legs with the whip, rope, pad, hand and not have it move away. When you have accomplished this step you can begin to think about saddling the horse.
If you have to take a break from training at any level, always begin again with a part of training that the horse accepts and understands. Always try to end the lesson on a positive note.
Tying to a solid object:
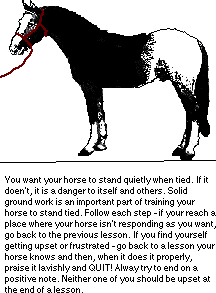
After halter breaking, your horse needs to learn to stand tied. This will be extremely important throughout it’s life. You must be able to tie your horse to groom, trailer, tack up and so on. This can be a dangerous lesson for both you and the horse. NEVER leave a horse that is tied unattended. When I was in high school my best friend lost her new Quarter Horse filly to a broken neck the night she got it for her birthday. She only left her for a minute to go to the house & get a brush. She learned a hard lesson that night.
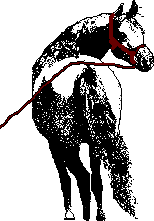
If your horse pulls back while tied, the problem is that it hasn’t learned to respond correctly to the pressure it feels on it’s head. We must teach it to give to the pressure it feels. This lesson will help you in leading your horse also.
Step 1
Teach your horse to turn toward the pull of the rope. Using a long line, in the arena or round pen, lead your horse around. Making wide turns, with you to the inside of the turn, gently turn the horse’s head toward you as you walk. It should give it’s head, bending it’s neck toward the direction of the turn. Practice this until your horse is giving easily to this lesson. Do this leading from both the left and the right.
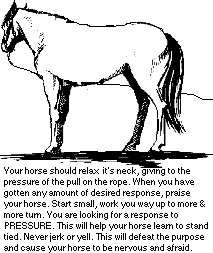
You should not jerk the rope, but use a gentle, steady pressure for a few seconds. Again, we are building toward a goal. The goal is achieved in steps. Don’t fight it, if your horse doesn’t respond well expect LESS of a turn. See Halter Breaking.
Step 2
When your horse has mastered this lesson, let it have a longer lead before asking for the turn. Do it the same way. Both left and right. If your horse isn’t responding well then go back to the first step. Do the first step until mastered, then return to this step.
Step 3
Now your horse is ready to advance to the next lesson – giving to indirect pressure. In this lesson you will bring the rope over your horse’s back. You are going to ask the horse to turn into the side the rope is pulling on. You will be on the right, the horse will turn to the left.
Use the same amount of pressure as you did before. It may take a few times before your horse gets the idea. When it does give to the rope, PRAISE IT LAVISHLY. Next, do the reverse – you on the left, the horse turning to the right. Praise it for a job well done.
Step 4
Working on the fence, put the rope around a solid post, don’t tie it. Your horse may back up. Let it back some and then hold the rope firmly so it puts pressure on the horse’s head. If you did the previous lessons then your horse should stop when it feels the pressure of the rope. If not, return to the previous lesson. If the horse responds well, shorten the rope some. The horse should walk toward the post. If he fights, return to the previous lesson. The idea is that you should work on the lesson until the horse understands it. If it is fighting, it doesn’t understand. We use this method to teach out horses to tie, both foals and older, untrained or abused horses. It does work, but it takes time. Your goal is to get your horse to stand tied. You are working toward that without actually tying it.
Step 5
Your horse should be able to stand at the fence with the rope around the post (one time) but not tied. It should have about 18" of slack. Your horse should stand quietly without pulling. If not, go back and work on it. If it does, now you are going to simulate some situations your horse may be in while tied. You need someone to help you with this part. Have your helper walk by the horse. If it pulls, hold firmly and give it a chance to settle down. If it starts to panic, let it have some rope. It will probably want to turn to look at the scary person walking by. When it see the person isn’t going to eat it, try again. It helps if the person is making a little noise at first, like quietly talking to you. Repeat this part until the horse doesn’t respond to the person walking by at all.
Step 6:
The horse should be in the same position as the previous lesson. It should not care if someone walks by, either talking or quiet. This time you are going to have your helper put the saddle pad on. Your horse should have already experienced sacking out. Have your helper approach the horse with the pad. Let the horse smell it and see it. Have your helper put the pad on the horse’s back. If it pulls back at any point, hold firmly. If it panics, take a step back to the previous lesson. If your horse accepts the pad, let it stand quietly & pet it. Tell it how smart and wonderful it is – horses love this. Now, have your helper make the pad fall off. It may scare the horse some. That’s OK, you want it to be a little scared so it can experience things that might happen in real life. Hold firm to the rope. Your horse should be learning to accept firmer pressure so when it is tied it won’t pull. Some resistance is natural, you just don’t want it to really freak out. When the horse gives to the pressure and stops pulling, praise it. If it panics do the previous lesson. Keep trying until it doesn’t care anymore. Do this lesson with a lead rope over the back, touching the legs, putting the pad on and off, letting it fall on one side and the other. You should be able to hold the rope without using too much strength. If you are fighting the horse, you need to start over, yes, from the beginning. All this may take a few hours or weeks, depending on the horse.
Step 7
When you are sure that your horse will not panic when you challenge it, you may try tying the horse. Use a quick release knot. Tie the horse, hold the free end of the rope so if it panics you can release the knot. If your horse does panic, begin from step 1 or 2. If it doesn’t do steps 5 & 6. If your horse accepts this, you have been successful. Give it a good grooming while tied, returning to a well understood and accepted step any time your horse panics.
NOTE
Some people tie the horse right away & just let it fight. You are asking for injury if you do this. War bridles and other pain inflicting training "aids" serve only to cause resentment and fear. It is much better to earn the animal’s trust, that way you will be able to trust it, rather than expecting the unexpected at any moment.
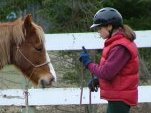
Rubbing it’s head on you:
I see it all the time, horse owners try to halter or bridle their horse and the animal constantly knocking on them while trying to rub it’s head and face against them. This is a bad habit to let your horse get into. Little kids get knocked down or hurt from a horse hitting against their head. Adults knocked off balance and hit in the face. Most horses are itchy, so, take care of their itches while grooming.
Brush your horse’s face with a very soft bristled brush; brush behind the ears and on the face, under the chin and where the head joins the neck avoiding the eyes. Don’t let the horse or pony rub on YOU; if it does, stop what you are doing and say NO in a very firm tone. You don’t have to yell, just be firm.
Resume grooming. Grooming is a good time to make this lesson because your horse will be more interested in itching and you will have the halter on for further discipline. Each time your horse tries to rub (don’t wait until it DOES rub, catch it before) say NO in a firm voice. If you are a parent, just remember how you taught your little one not to touch the stove. Same idea.
If the horse insists on rubbing, hold the lead right below the halter. When it starts to rub, give a LIGHT tug and say NO in a firm voice. Don’t jerk it’s head – just a tug. Start with just the voice command NO, if that doesn’t work after several tries, then go on to the tug and NO together. Training takes time. Some horses learn faster than others. Don’t be too impatient.